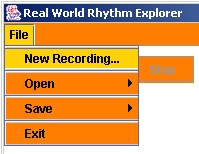
Record Sound
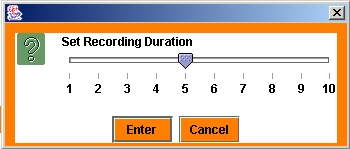
This will open the New Recording Dialog box which allows you to select the duration of the sound you would like to record. Simply move the slider to set the duration from 1-10 seconds long. Then press ENTER and you are ready to record!
To make your recording, press the RECORD button. This immediately starts the recorder. You will know that you are being recorded by the flashing status indicator. This indicator counts down from 10 to 0 to display roughly how much time you have remaining. The count down will always decrement from 10 to 0 regardless of the duration of the recording you have chosen.
If you press the RECORD button again, you will record over the previous sound, so be careful!
Play Sound

If you check the LOOP SOUND box, the sound will repeat until you press the STOP button or un-check the LOOP SOUND box
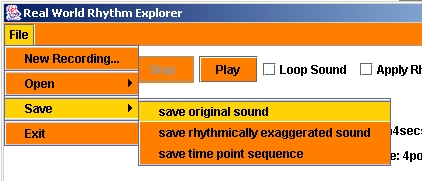
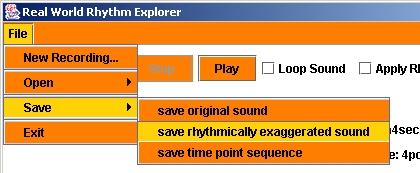
Save Sound
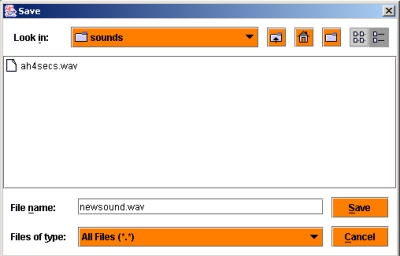
This will open a dialog box which allows you to name the sound and chose where to store it.
It is recommended that you store the file with the suffix ".wav" to indicate that it is a sound file.
Open Sound

This will open a file dialog box from which you can locate the sound you would like to load. Once you have found it, either highlight the file and press OPEN or simply double-click the file you would like to load.
Please note that you can only load sound files from this option, so only select files which end in ".wav" of ".aiff".
Input Time Points
To input a sequence of time points, press the INPUT TIME POINTS button. You will hear the sound begin to play and will see the status button flash - this means that you are recording inputs! To create a time point, click the TIME POINT! button. This will register a time point at that instant in the sound file.

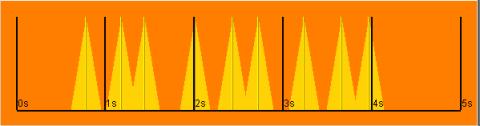
Once the sound has finished, the software will collect the input time points and will display them in the lower panel. Note that duration marks are in black with labels which correspond to the duration of the sound in seconds. Now you will see mountains which peak at the points where you entered a given time point.
If you again press the INPUT TIME POINTS button you will immediately overwrite the existing points and can input a new set of time points in the same manner as before.
Hear the Time Point Exaggeration
The mountains which are drawn along the bottom illustrate a volume curve which will be applied to the original soundfile.
To play the sound with the time points, select the Apply Time Point Exaggerations checkbox. Then press the PLAY button. You will easily hear how the time points bring out the rhythm that you entered. You will hear a rise and swell in the volume of the sound which corresponds to the time point graphic.

To hear the original sound, un-check the Apply Time Point Exaggerations checkbox and press PLAY
Adjust Time Point Exaggeration
To make this adjustment, move the slider to the right to increase or to the left to decrease the severity of the exaggeration.

You will see the time point peaks smooth or sharpen according to movement of the slider, and when you play the sound you will hear a proportionally smooth or jagged rise and fall in the volume of the sound.
Moving the slider to the right will create a very abrupt volume change while moving it to the right will create an increasingly gradual change.
Note as well that when you move the slider to the right, the volume curves will sometimes overlap. The volume will drop in proportion to the depth of the resulting valleys.
Save Time Points
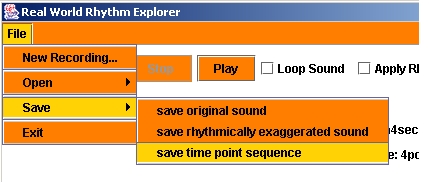
Just as when saving a soundfile, this will allow you to save the time points to any location on your computer. It is recommended that you apply a ".tim" suffix to the filename to indicate that this is a time point sequence file.
Save Exaggerated Sound
To save the exaggerated soundfile, go to the FILE menu, choose SAVE and then choose SAVE RHYTHMICALLY EXAGGERATED SOUND. This will open a file dialog box allowing you to select where you would like to save the file and what you would like to name it.
Just as when saving a normal soundfile, you should append the soundfile name with the suffix ".wav"
Open Time Points
You can only open time point files from this dialog box, so only choose file which end with the ".tim" suffix.
Overlay Sounds and Time Points
Note that the durations of the sounds and time point sequences don't have to match. Try opening a time point sequence. Then record a 4 second sound. Then open a 6 second sound. The time scale along the bottom will change with the different sound durations, but the rhythmic time sequence will preserve its proportions, just scaling across different lengths of time.