setting up the Oculus Quest 2 in room 313
11/14/2024
physically connecting the goggles
The first thing to do is to make sure the Quest goggles are phyically
connected correctly. To start, the main monitor
in room 313 can be switched from the Macintosh
computer to the Windows computer -- it will need to be set to the
Windows machine, obviously.
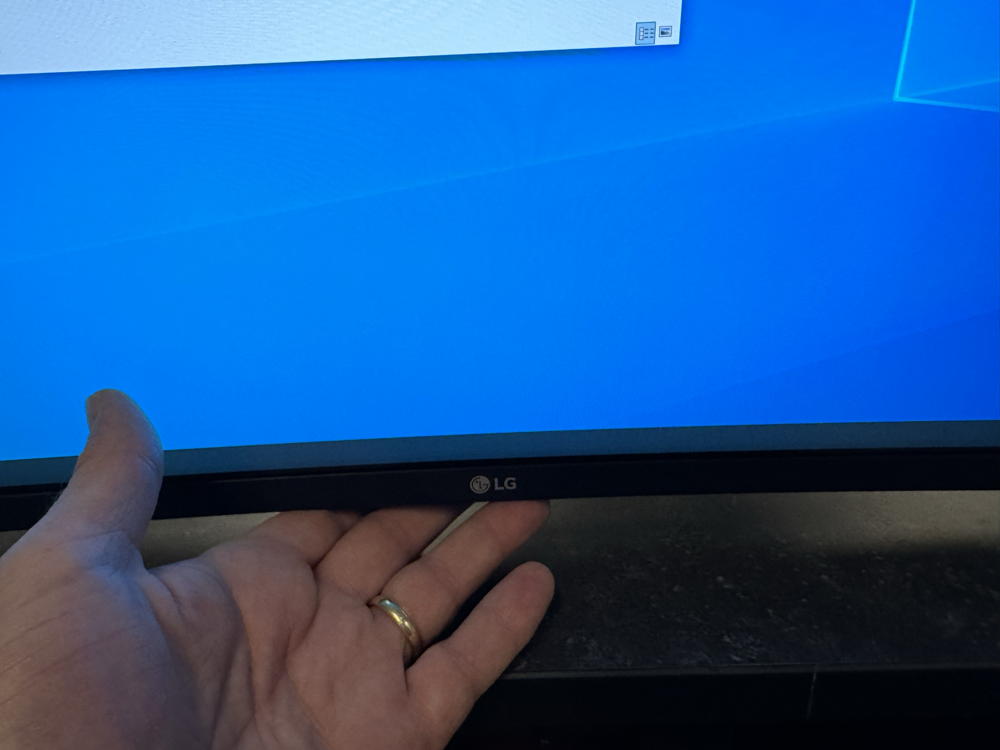
If it needs to be switched from the Macintosh,
at the very bottom/center and back a little bit is a small joystick-like
switcher that allows for changing the input to the monitor.
Push up on it and this menu should appear:
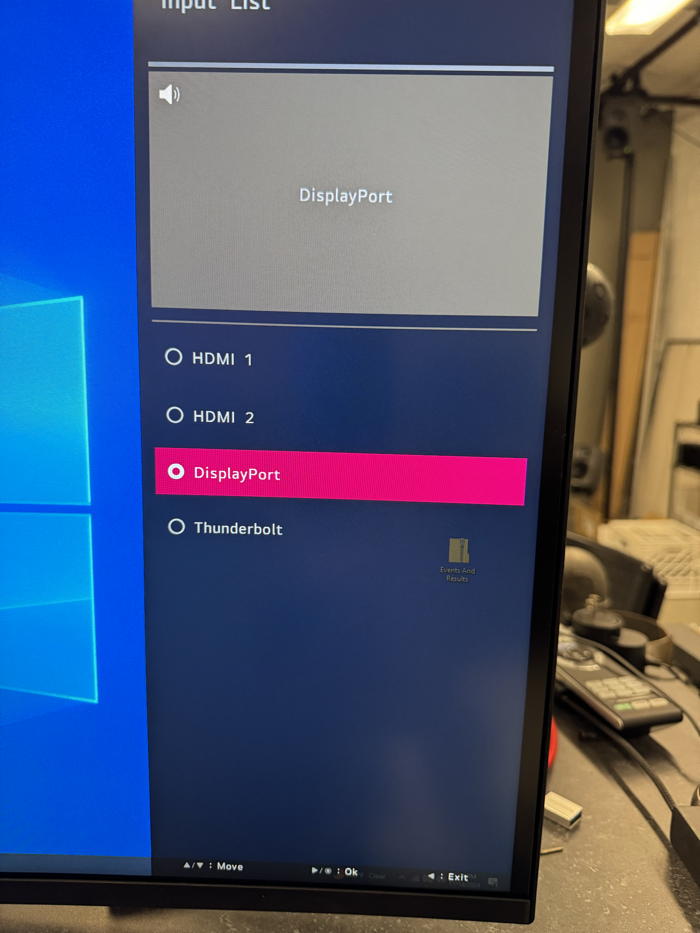
Moving the little joystick to the left, to select "Input",
will bring up the following
menu on the right-hand side of the monitor screen:
Use the joystick-thing to select "DisplayPort". The Windows desktop
should now be showing.
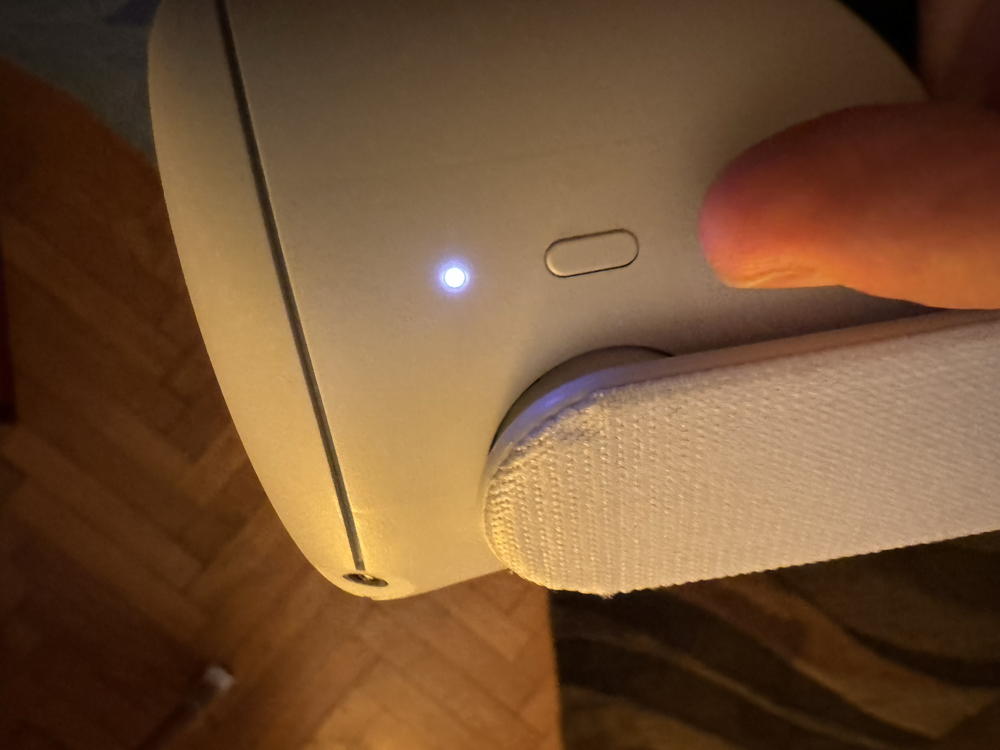
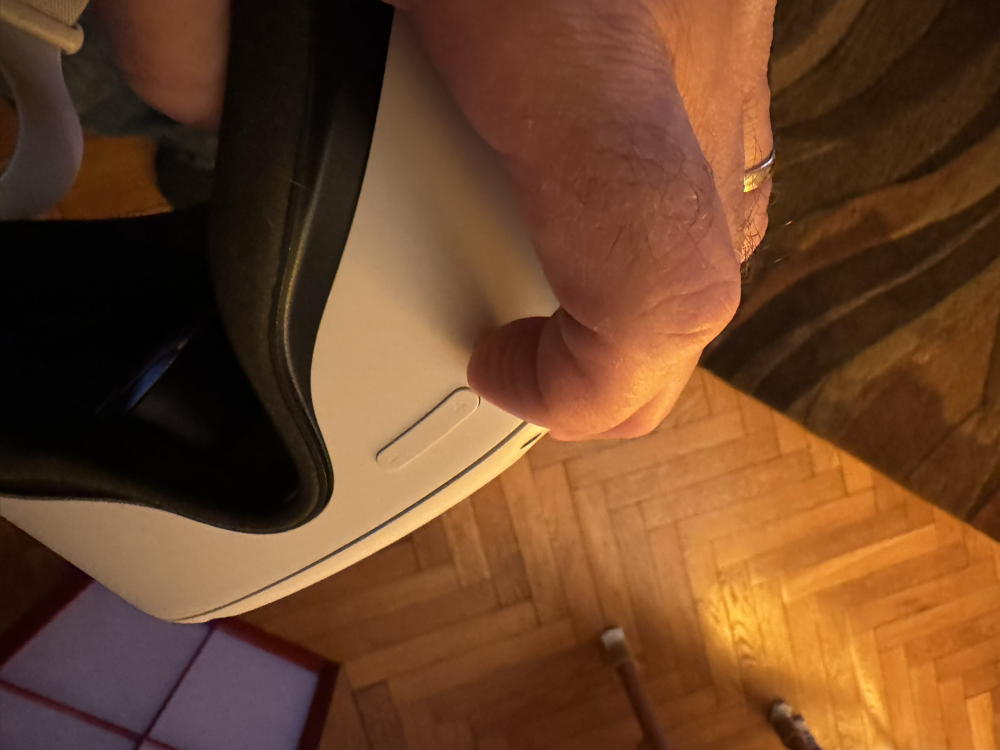
Now check to see if the goggles are turned on. There is a little pushbutton
on the side:
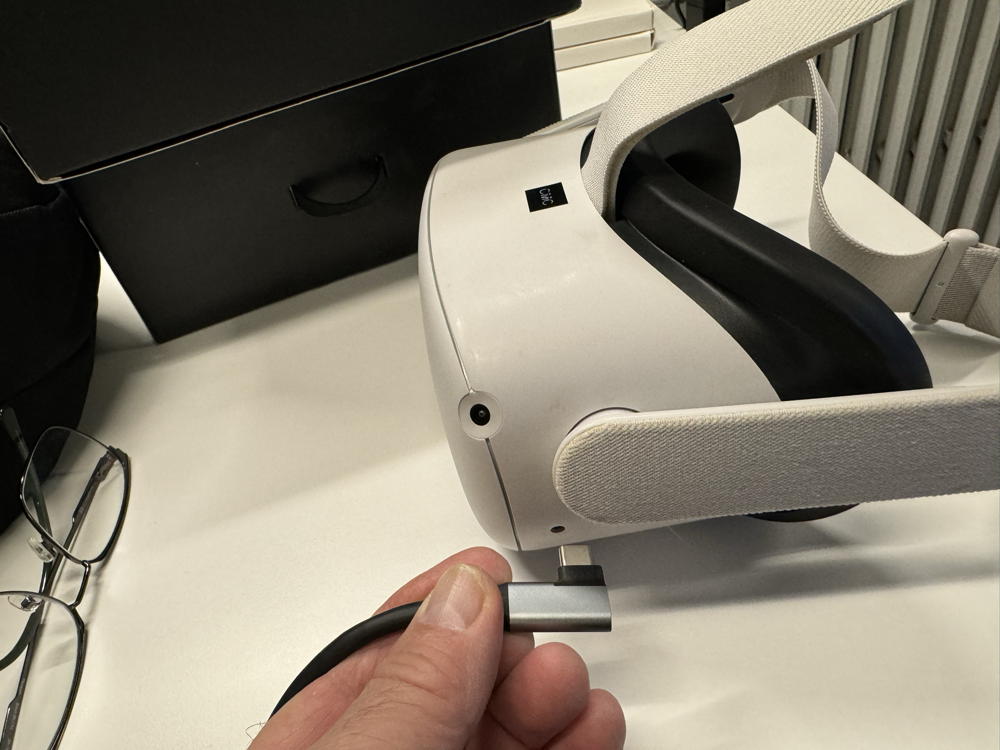
Next, check to be sure the long USB cable is plugged into the goggles:
And be sure that the USB cable is plugged into one of the USB ports
on the back top of the Windows computer (NOTE: You can also use
these for a thumb drive to transfer your Unity project(s) to the
Windows machine.):
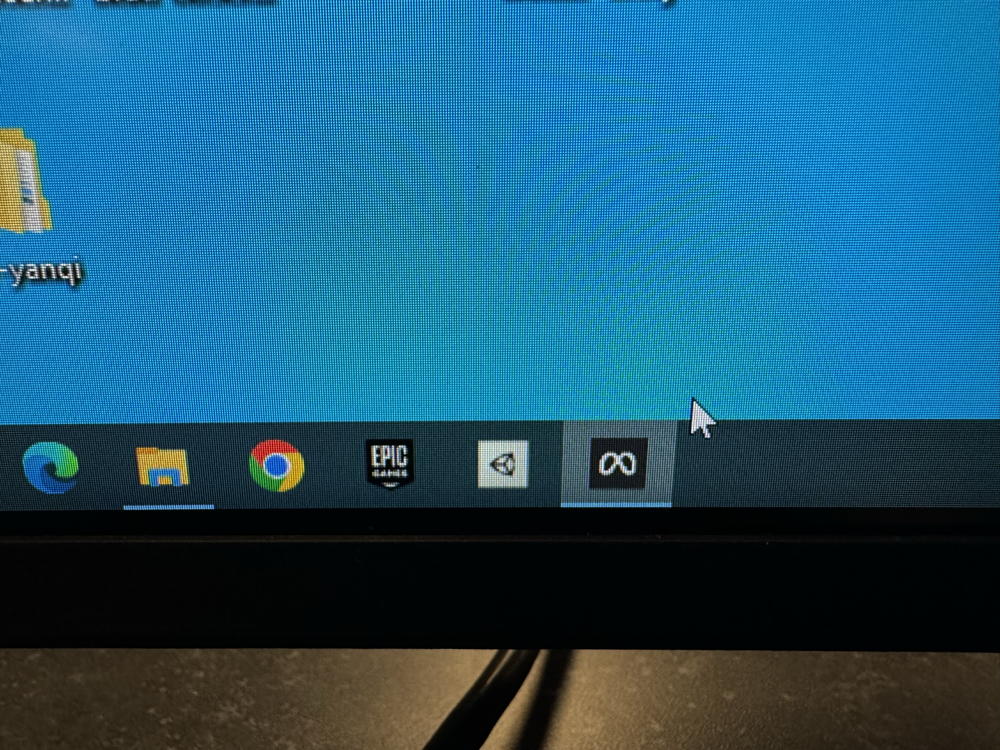
It might be advisable to start up the "Meta" Windows application (on the
taskbar), but if you don't it should be invoked automatically
when configuring the goggles with the Questlink (below).
setting up the Questlink
(NOTE: In the following, 'clicking' means aiming one of the controllers
and pulling the trigger when the proper menu-item is selected)
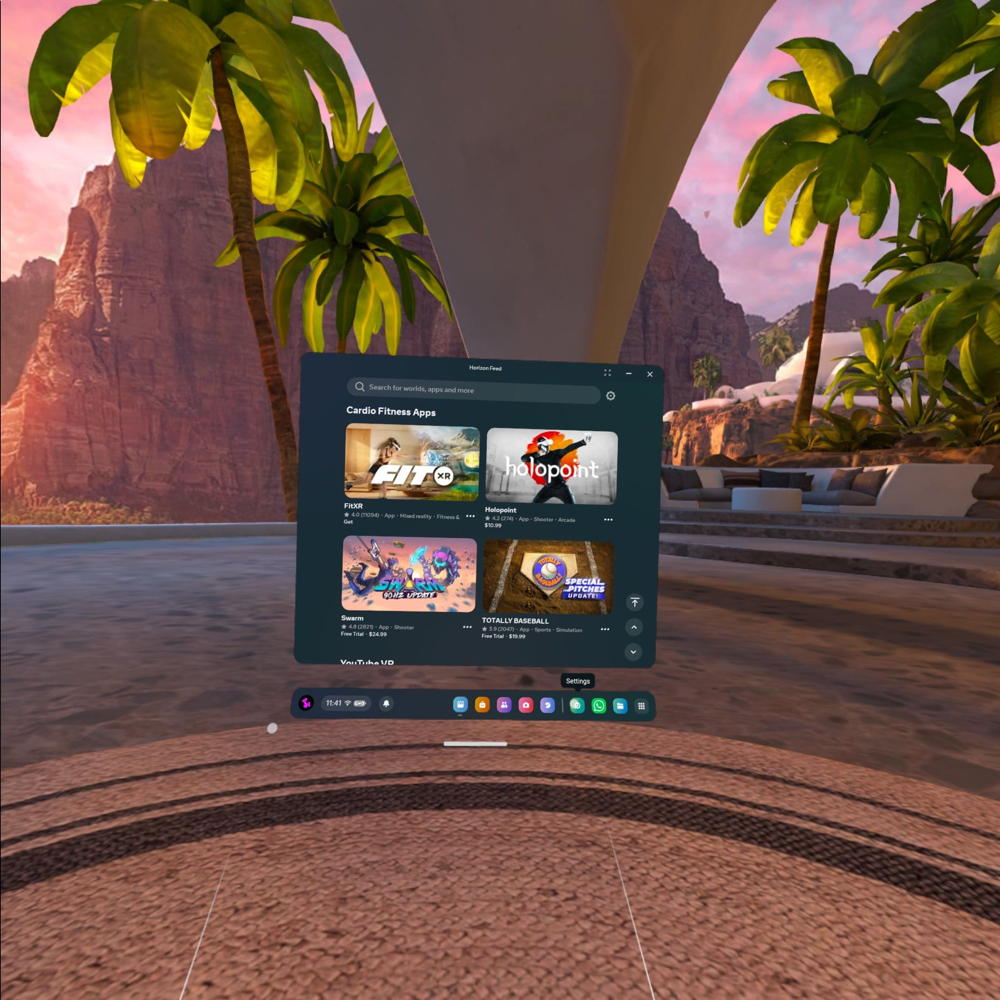
After getting the goggles wired into the PC, you will need to connect
to the PC from the goggles. Put on the goggles and you should see
a main 'console' display something like this (don't worry if it has
different panels and/or background
displaying, we're just going to use it to conifgure
our Quest Link to the PC) (NOTE: You may see some warnings about
'objects being within your boundary'. Unless you plan to be dancing
around room 313 with the goggles on, you can safely ignore
these and click "Continue".):
Find the little "gear" icon down on the right-hand side of the
control panel and click on it:
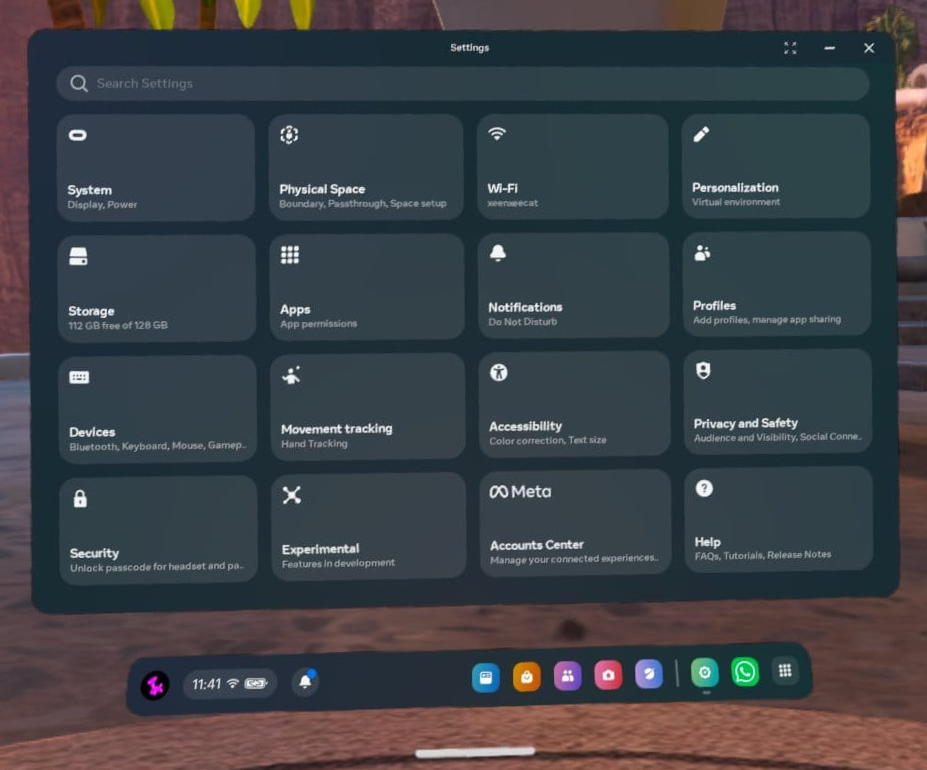
This should bring up a display like this:
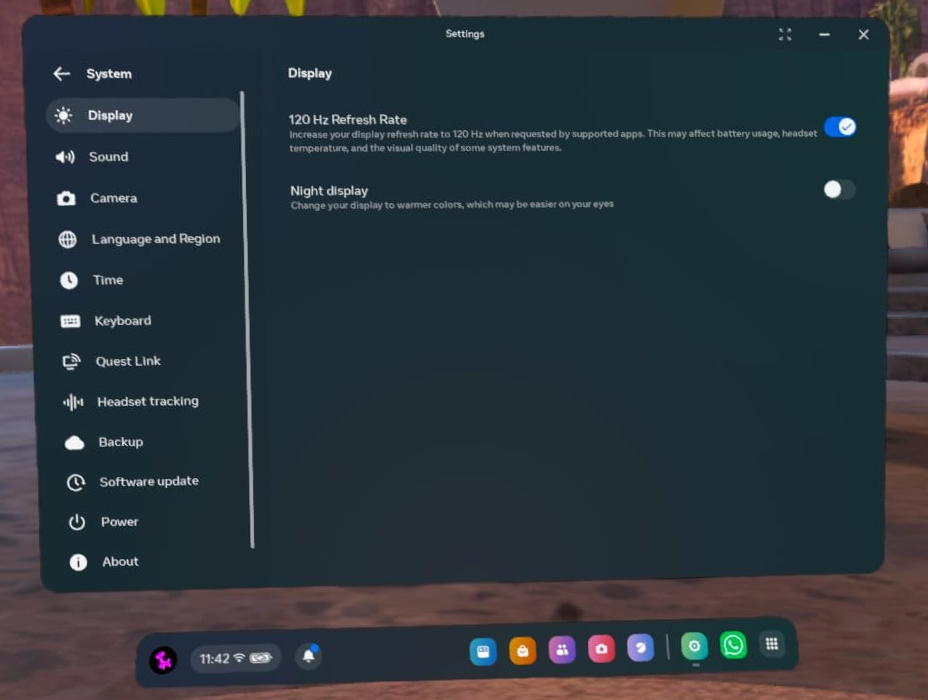
Click on "System" in the upper left, and this should appear:
(NOTE: "Display" was selected and it is showing information about the
Quest display. One of the others on the left may have been selected
when this appears. That's ok.)
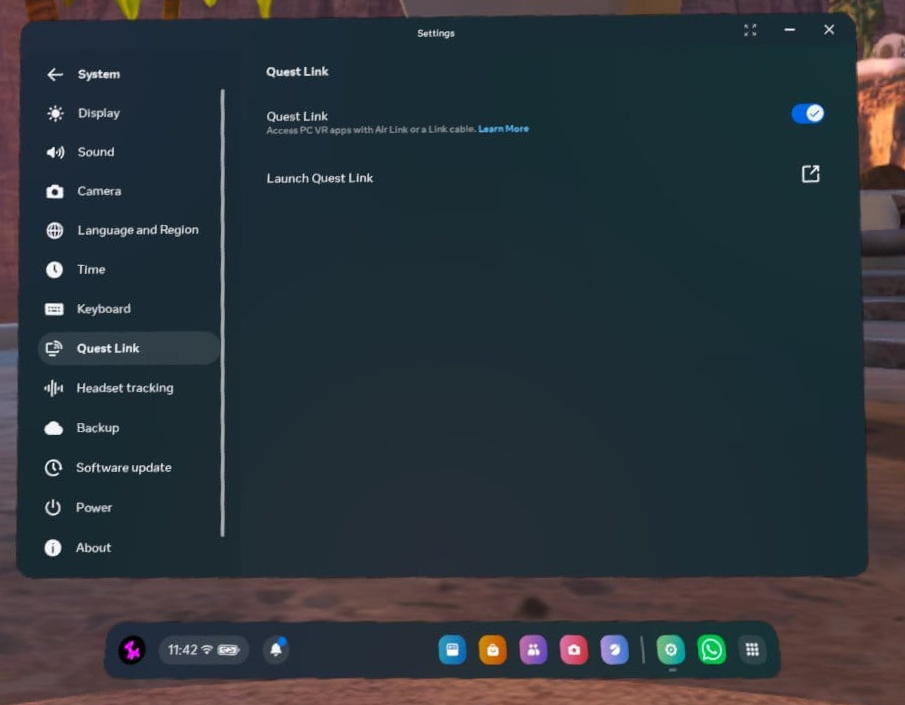
Select "Quest Link" a little over 1/2-way down in the left menu.
This should be the result:
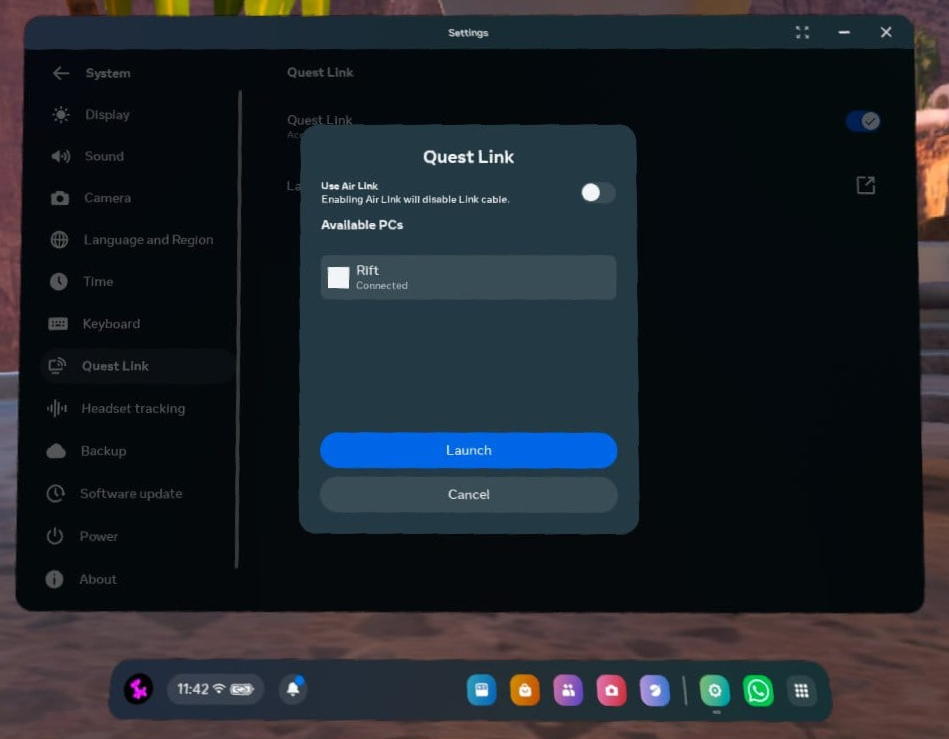
Click the little icon to the right of the "Launch Quest Link" entry, and
this should happen:
You can then choose to use the "Air Link" option, meaning you don't have
to connect the goggles to the PC with a cable, but it has been unstable
lately. The cable is recommended for now.
Click "Launch" and it should connect to the PC. Running Unity configured
for VR will now display through the goggles, and the left- and right-hand
controllers should work as well (NOTE: You can still use the main
PC monitor display with Unity and the arrow-keys to get around with
Questlink enabled.)
preparing a Unity project for VR viewing
(NOTE: This is done on the computer running your Unity project; this
is not done using the Quest goggles.)
In order to view a Unity project in VR, "XR Plugin Management"
needs to be set up. This can be done on your computer (OSX or
Windows) or on the Windows computer in room 313. It probably makes
more sense to do it on the 313 machine.
This assumes you are using the "brad-observer2020" package. If not,
you will need to do a bit more work to configure the Unity camera
properly. This is not discussed here.
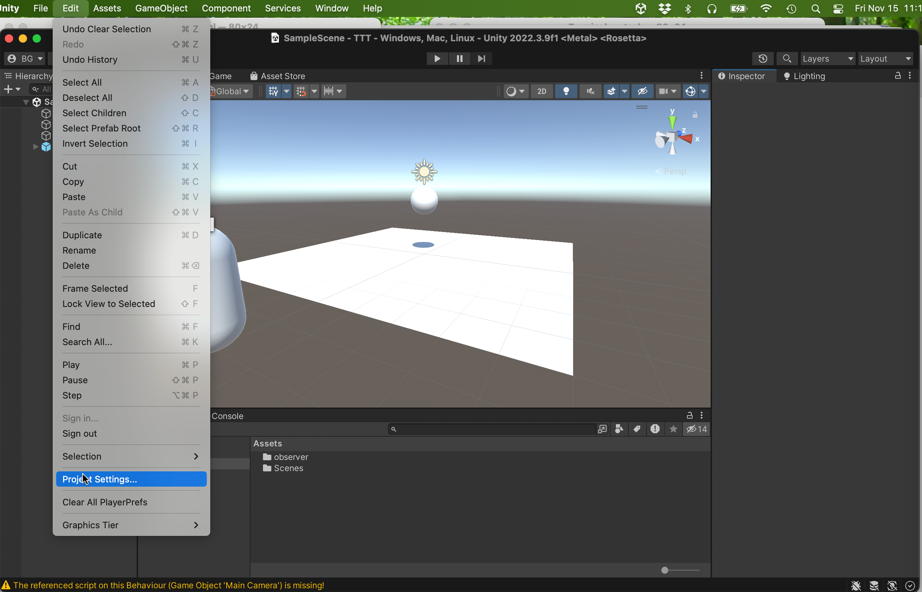
First, select "Project Settings" from the main Unity "Edit" menu:
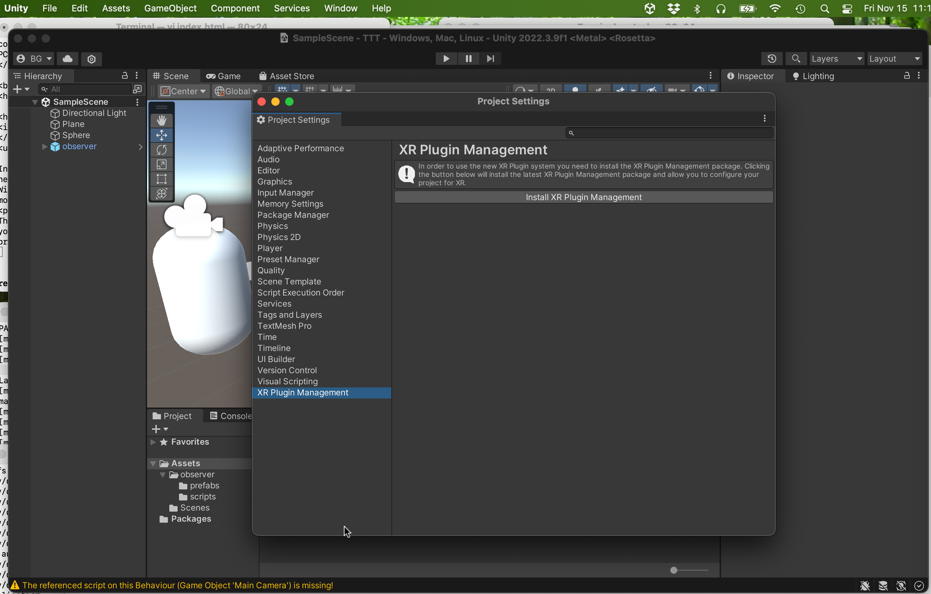
This will bring up a "Project Settings" subwindow, Select and click
on the "XR Plugin Management" menu-entry on the left (at the
bottom), Then go ahead and click "Install XR Plugin Management"
in the main paft of the window:
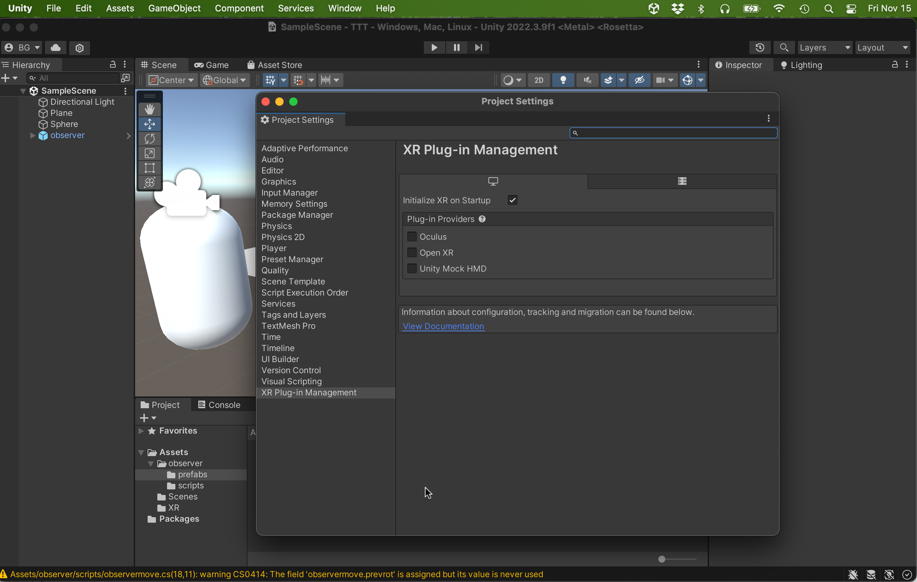
After installing the "XR Plugin Management" (should take a minute or two),
the following should appear:
Be sure that "Initialize XR on Startup" is checked and then select/check
"Oculus" as a Plug-in Provider.
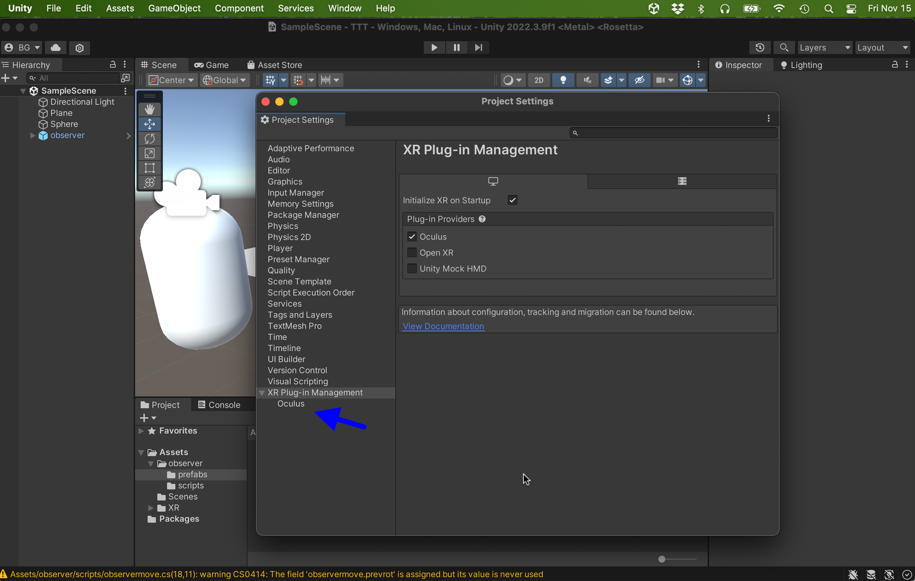
After Unity has finished installing the Oculus plugin package,
an entry "Oculus" shoud appear under the "XR Plugin Management" menu item
in the left menu of the "Project Settings" window:
Select this menu item, and this should result:
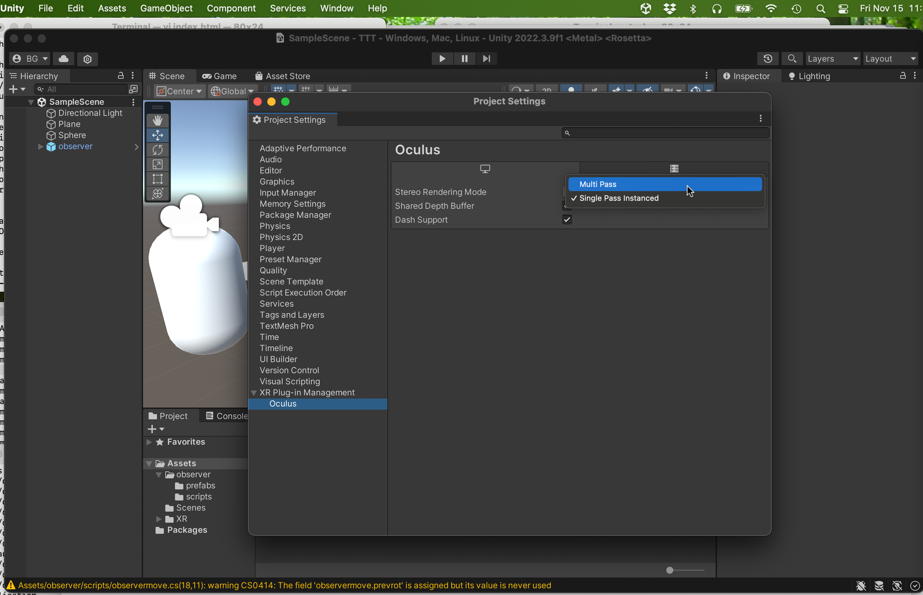
If the "Stereo Rendering Mode" is set to "Single Pass Instance",
you will need to change it to "Multi Pass":
Once you have done this, you can close the "Project Settings"
window, and when you 'play' your Unity scene it will render
to a properly connected/configured Quest headset.
a few additional things
When you are done, find the "Settings" through the goggles (I don't
have a screen-shot of this). Click on it, and you want to find the
"Disable Quest Link" button. Click on it to terminate the link
between the goggles and the Windows computer.
Leave the goggles plugged in to the computer via the long USB cable,
though. This will keep them charged up.
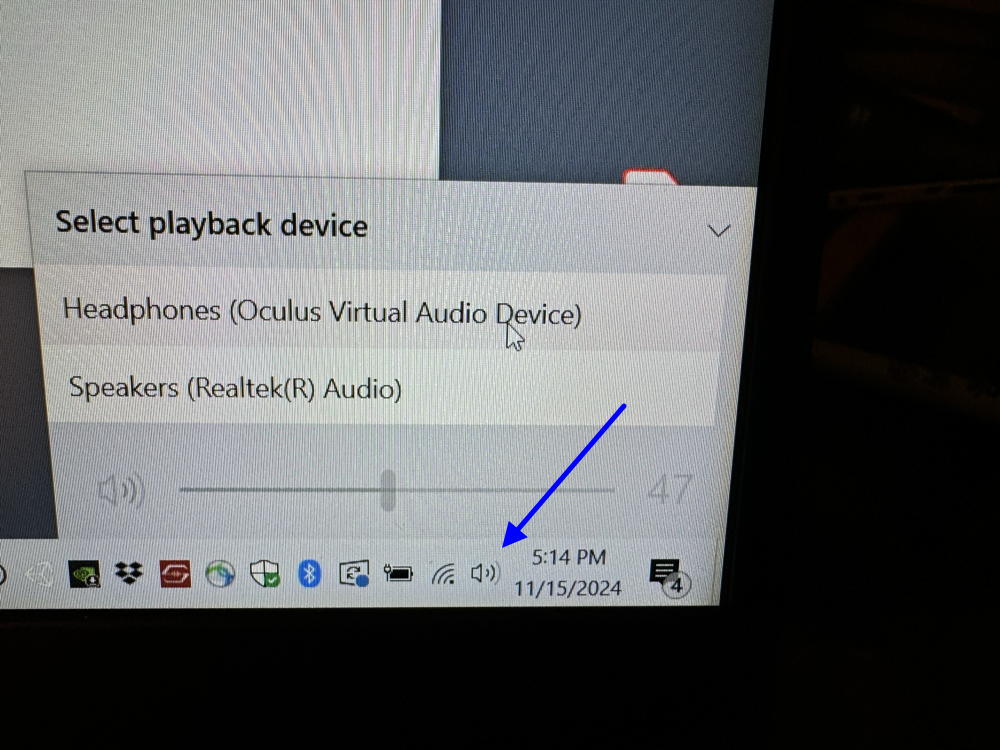
If you are not hearing audio, check your audio settings by clicking
on the lttle speaker icon on the lower right part of the Windows
machine taskbar:
You can also adjust the audio volume using the 'rocker' switch on the
bottom of the Quest goggles: